Help Center
Print
How to create/manage the vehicles
Adding vehicles is a vital step in managing your fleet effectively. This guide explains how to add, edit, and manage vehicles in the Backoffice application.
Steps to Add a Vehicle
Step 1: Access the Fleet Management Page
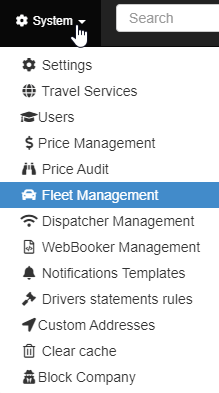
- Navigate to “System → Fleet Management” in the Backoffice application (Fig. 1).
- The page is divided into two sections:
- Car Types List: Displays vehicle categories.
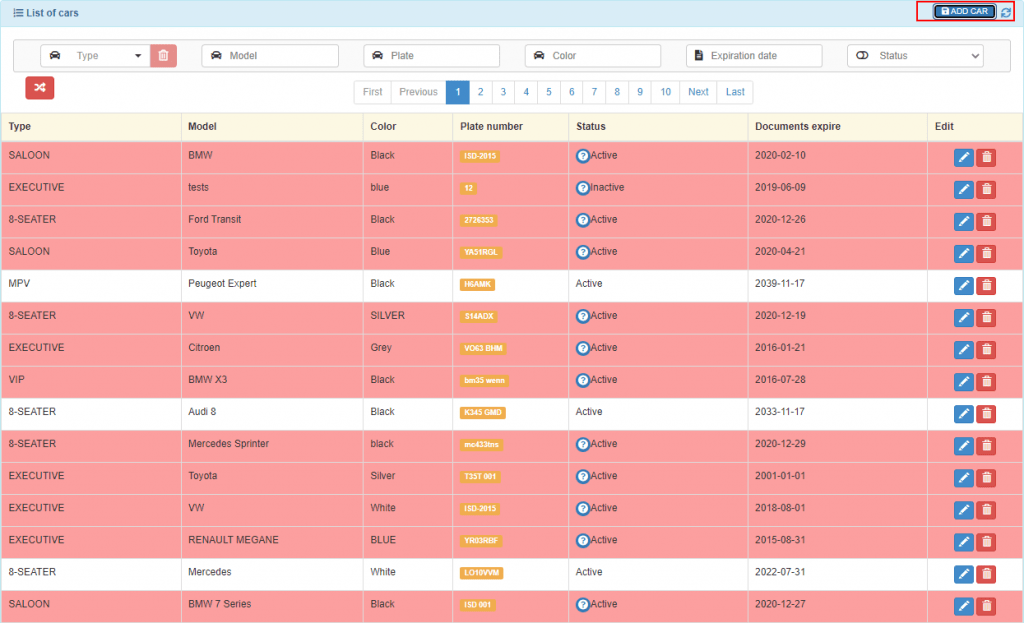
- List of Cars: Shows all registered vehicles in your fleet.
Step 2: Add a New Vehicle
- In the List of Cars section, click the “ADD CAR” button (Fig. 2).
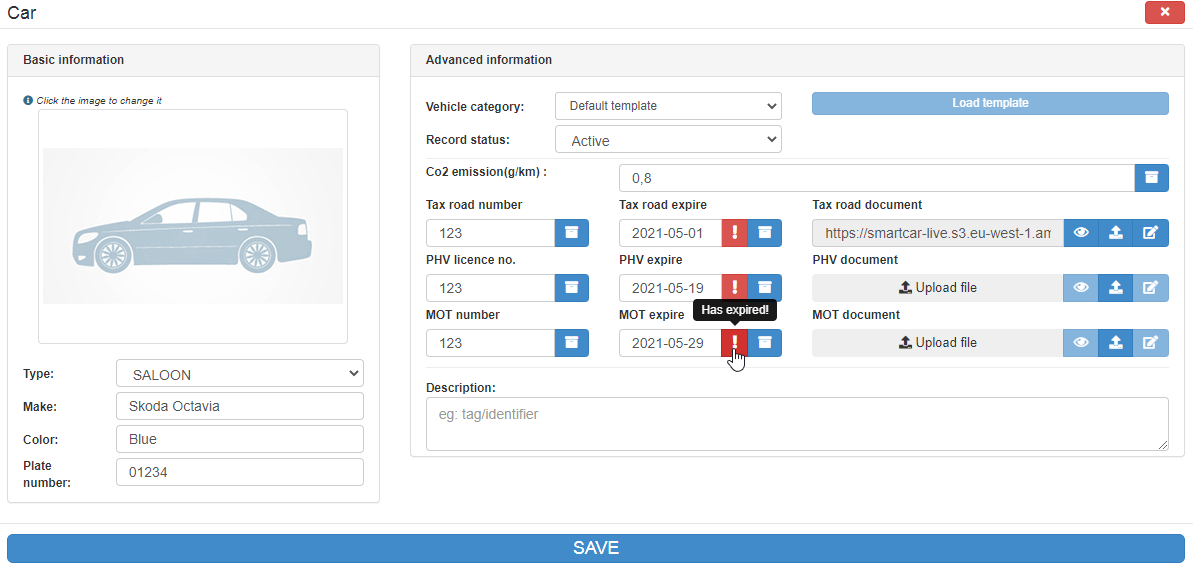
- A pop-up window will appear with fields for adding the vehicle details (Fig. 3).
- The window is divided into two sections:
- Basic Information: Assign the vehicle type, model, color, and plate number.
- Advanced Information: Add document details and expiration dates.
Step 3: Configure Advanced Information
- Select a template from the “Vehicle Category” drop-down menu (Fig. 4).
- Click the “Load Template” button to populate the advanced information fields.
- These fields allow you to input document details, such as insurance and licensing, along with expiration dates.
- Special icons will appear if documents are expired or nearing expiration.
Step 4: Save the Vehicle
- Ensure all mandatory fields (marked with a red border) are completed.
- Click the “SAVE” button to finalize the new vehicle entry.
Step 5: Edit or Delete a Vehicle
- Locate the vehicle in the List of Cars.
- Use the buttons available for each vehicle to:
- Edit: Update vehicle details, documents, or status.
- Delete: Remove the vehicle from the system (Fig. 4).
Key Features of Vehicle Management
- Basic and Advanced Details: Customize vehicle entries with detailed information, including documents and expiration alerts.
- Template-Based Configuration: Use templates to streamline advanced information inputs.
- Centralized Control: Manage all fleet vehicles from a single interface.
Figures and Illustrations
- Fig. 1: Accessing the Fleet Management option in the System menu.
- Fig. 2: Adding a new vehicle via the “ADD CAR” button.
- Fig. 3: Completing basic and advanced information fields in the vehicle input window.
- Fig. 4: Editing or deleting vehicles from the List of Cars.


If you wish to edit or delete a car, simply use the buttons available for each car in the list.