Help Center
Print
How to create/manage the vehicle types
Creating vehicle types is a vital step in managing your fleet effectively. This guide explains how to add, edit, and manage vehicle types in the Backoffice application.
Steps to Create a Vehicle Type
Step 1: Access the Fleet Management Page
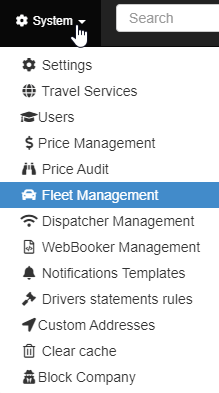
- Navigate to “System → Fleet Management” in the Backoffice application (Fig. 1).
- The page is divided into two sections:
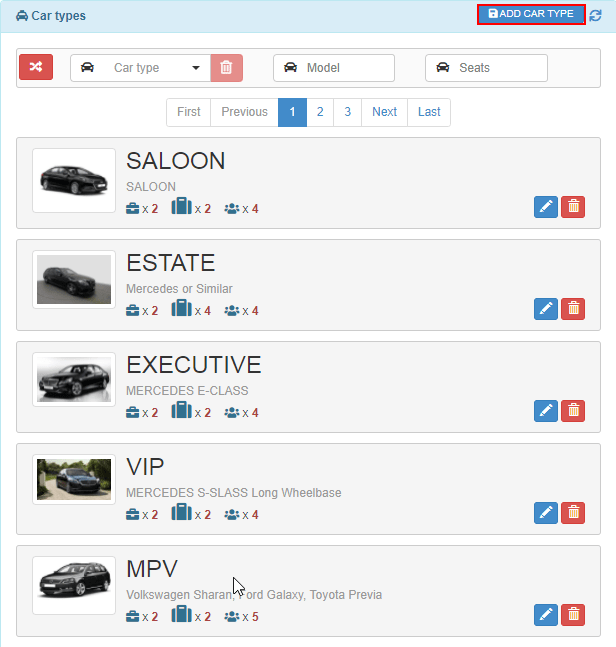
- Car Types List: Displays all existing vehicle types.
- List of Cars: Shows individual vehicles associated with each type.
Step 2: Add a New Vehicle Type
- Click the “ADD CAR TYPE” button at the top of the Car Types List (Fig. 2).
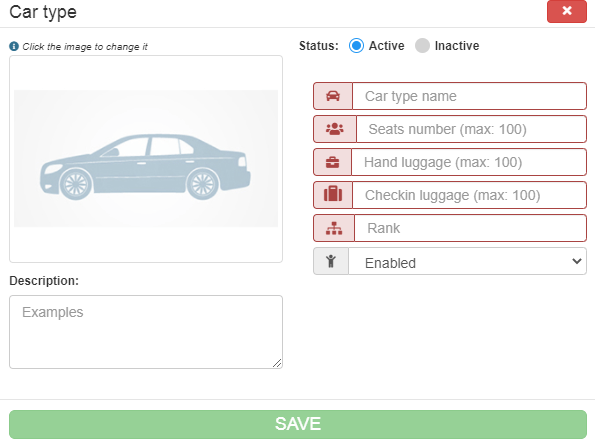
- A pop-up window will appear with input fields for the new vehicle type (Fig. 3).
- Complete the mandatory fields (marked with a red border).
- You cannot save the vehicle type without completing these fields.
Step 3: Customize Vehicle Type Details
- Optional configurations include:
- Active or Inactive Status: Set whether the car type is available for use.
- Baby Seats Option: Specify if baby seats can be added to this vehicle type.
- Vehicle Image: Upload an image representative of the car type.
- Description: Provide details, such as car models that fall under this category.
- Once satisfied with the information, click the “SAVE” button to finalize the new car type.
Step 4: Edit or Delete a Vehicle Type
- Locate the vehicle type in the Car Types List.
- Use the buttons available in the vehicle type card to:
- Edit: Update the details of the vehicle type.
- Delete: Remove the vehicle type from the system (Fig. 4).
Key Features of Vehicle Type Management
- Customizable Options: Add detailed configurations, including images and descriptions, for each vehicle type.
- Centralized Control: Manage all vehicle types and their attributes from a single interface.
- Streamlined Editing: Quickly update or remove vehicle types as your fleet evolves.
Figures and Illustrations
- Fig. 1: Accessing the Fleet Management option in the System menu.
- Fig. 2: Adding a new vehicle type via the “ADD CAR TYPE” button.
- Fig. 3: Completing mandatory and optional fields in the car type input window.
- Fig. 4: Editing or deleting a vehicle type from the Car Types List.


