Help Center
Print
Dispatch System – Audit page
Audit Page Overview
The Audit page provides a comprehensive tool for generating reports that offer detailed insights based on your selected parameters. This feature helps you track and analyze key actions and changes within the system.
How to Access the Audit Page
- Navigate to the “Audit” option in the application’s menu.
- Initially, you will see only a filter bar designed to refine your report criteria.
Steps to Generate an Audit Report
- Select Report Type: Choose the type of report you wish to generate (Fig. 1). The filter options will adjust accordingly to help you narrow your search.
- Apply Filters: Fill in the relevant filter fields to specify the data you need.
- Generate Report: Click the “GENERATE” button to create your report.
- View Results: A table will appear, displaying the requested data in a structured format (Fig. 3).
Understanding the Audit Table
The table provides valuable information through its columns:
- Action Column: Displays the type of action performed, such as create or update.
- Role Column: Identifies the user’s role who performed the action (blurred for privacy in Fig. 3).
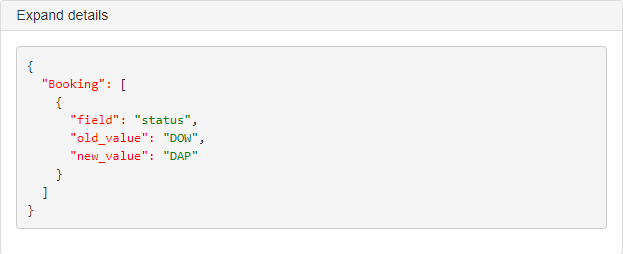
- Details Column: Highlights all modifications made during each action (Fig. 4).
- Example: In Fig. 4, the booking status was updated from DOW (Driver On the Way) to DAP (Driver At Point).
Key Features of the Audit Page
- Dynamic Filters: Tailored filter options based on your chosen report type for precise data extraction.
- Detailed Modifications: Track every change made to bookings, including user roles and specific actions.
- Custom Reports: Generate a variety of reports to suit your operational needs.
Figures and Illustrations
- Fig. 1: Report type selection for customized audits.
- Fig. 2: Filter bar and generate button.
- Fig. 3: Example of a generated audit table.
- Fig. 4: Details column showing booking status changes.


