Help Center
Setup Caller ID (VOIP) & INSOFTDEV Cloud
The Caller ID feature allows you to integrate VOIP calls into your system, enabling call identification, customer history access, and booking management. Follow the steps below to configure the Caller ID feature.
Step 1: Download and Install MicroSIP
- Download and install MicroSIP-3.X.X.exe for Windows.
- You can find the application on the MicroSIP website.
Step 2: Obtain the Required File
- Contact INSOFTDEV support to request the voip_incoming_calls.vbs file.
- Save the file locally on the computer where the MicroSIP application is installed.
Step 3: Locate the MicroSIP Configuration File
- Search for the configuration file MicroSIP.ini in its installation folder.
- Default location: C:\Program Files (x86)\MicroSIP.
- If the file is not found, search in: C:\Users%USERNAME%\AppData\Roaming\MicroSIP.
Step 4: Configure the Command for Incoming Calls
- Open the MicroSIP.ini file and locate the line:
cmdIncomingCall= - Replace it with the following command:
cmdIncomingCall=D:\voip_incoming_calls.vbs- Adjust the path if you placed the voip_incoming_calls.vbs file in a different location.
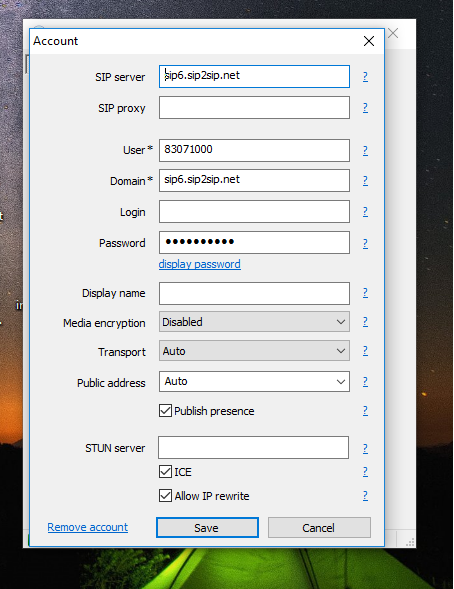
Step 5: Add Your VOIP SIP Account Details
- Open the MicroSIP application.
- Enter your VOIP SIP account credentials correctly.
Step 6: Verify the Setup
- Check for a green status message in the bottom-left corner of the MicroSIP application.
- This indicates the configuration is correct.
- Test the setup by making an outbound and inbound call.
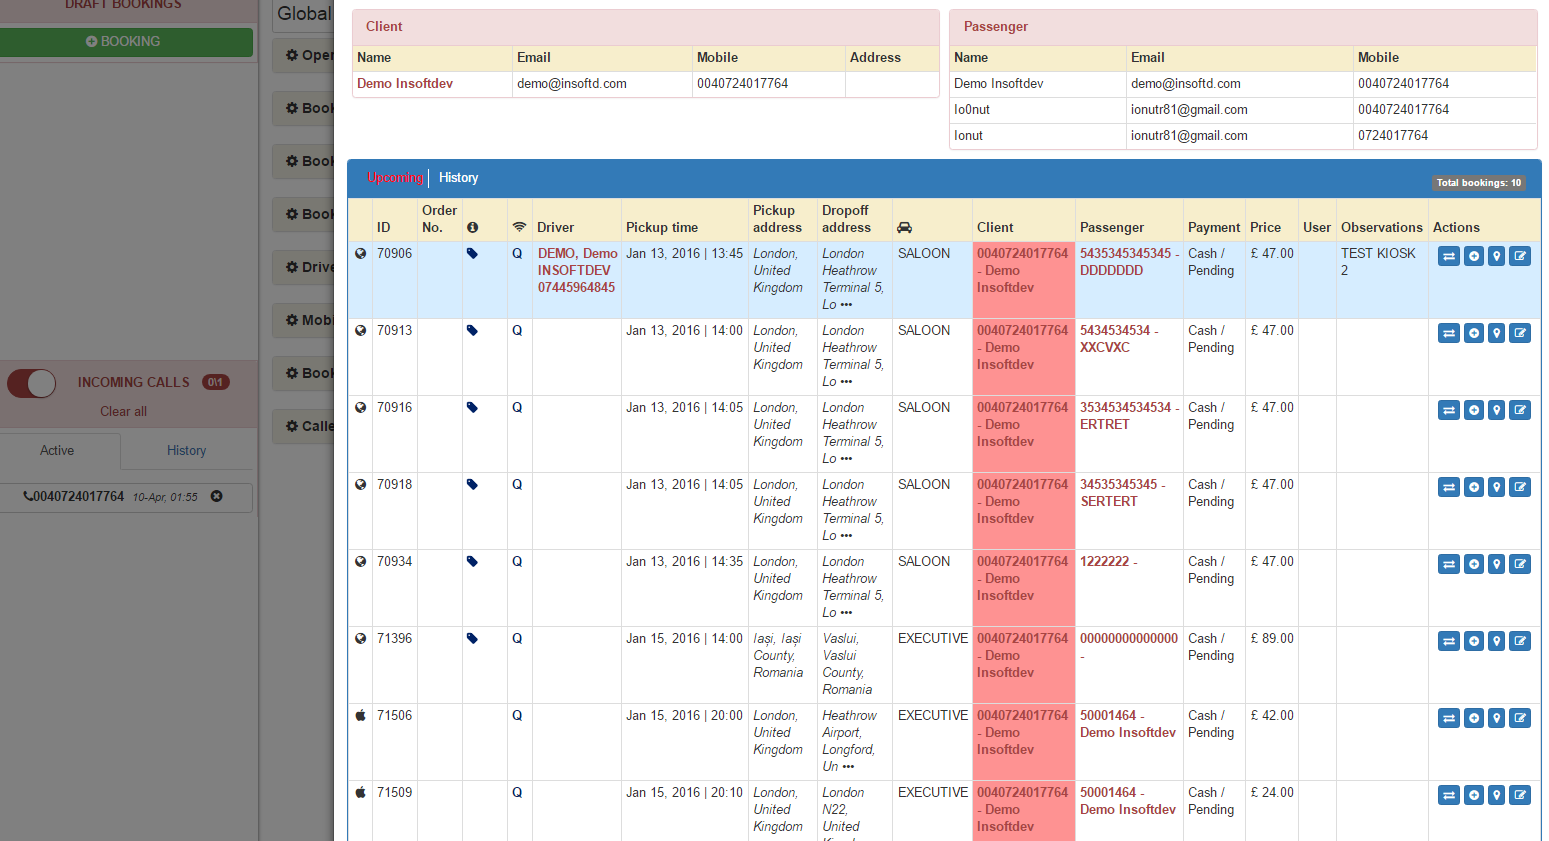
Step 7: Confirm Caller ID Integration in Backoffice
- If the setup is successful, incoming calls to your VOIP line will appear in the left sidebar of the Backoffice system.
- Features available for incoming calls:
- Caller Details: View customer information.
- Call History: Access previous interactions.
- Booking Management: Create new bookings or start from existing ones.
Key Features of Caller ID Integration
- Real-Time Call Display: View incoming VOIP calls directly in the Backoffice system.
- Customer Insights: Access caller history and details for personalized service.
- Streamlined Booking: Easily create or modify bookings based on incoming calls.