Help Center
Print
How to manage the travel services
How to Manage Travel Services in the Backoffice Application
Efficiently managing travel services is a key process that can be handled with ease in the Backoffice application. Follow this guide to set up, edit, and manage your travel services effectively.
Step 1: Access Travel Services
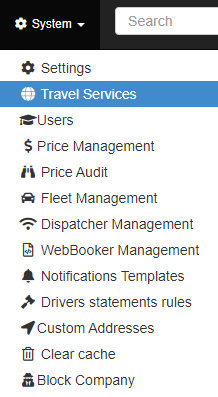
- Navigate to the “Travel Services” option in the “System” sub-menu (Fig. 1).
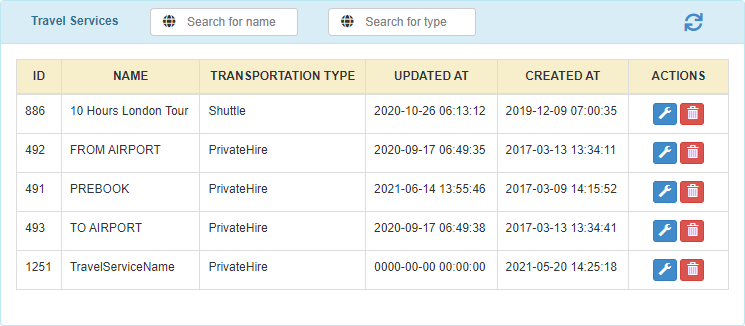
- The “Travel Services” page displays a list of all configured travel services (Fig. 2).
Step 2: Create a New Travel Service
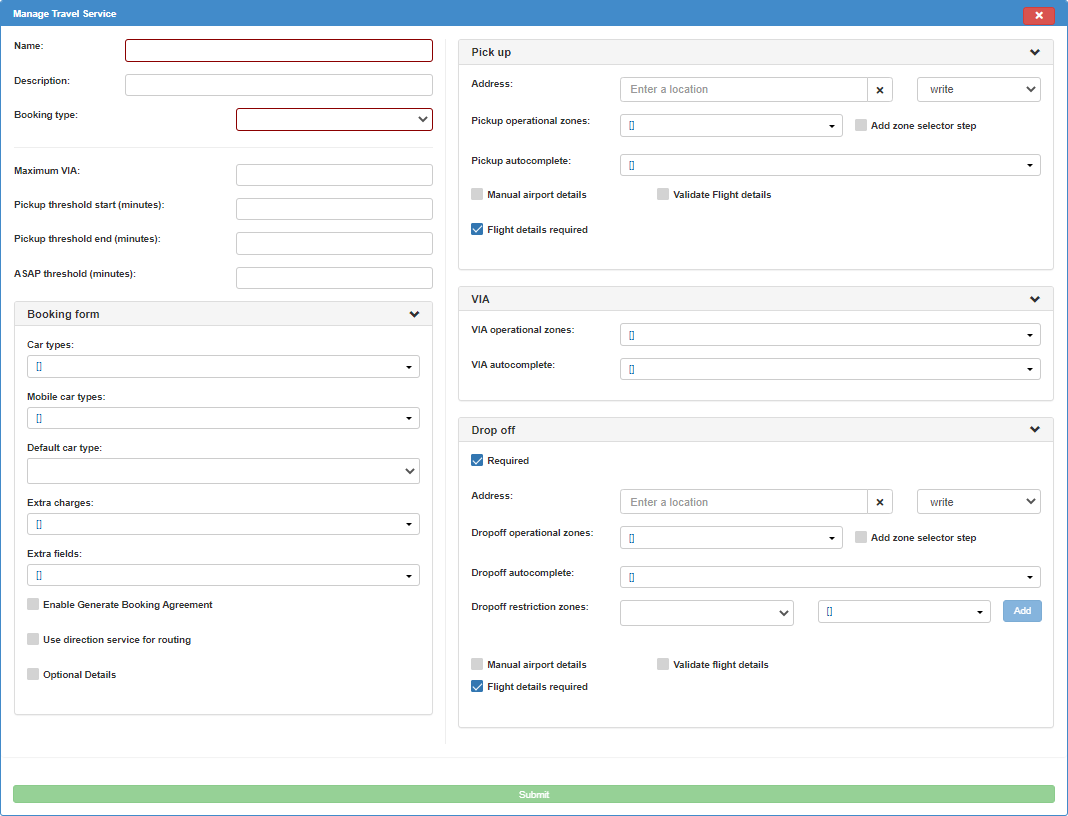
Click the “ADD NEW SERVICE” button to open the travel service editor (Fig. 3).
A configuration window will appear on the right side of the page, divided into four main sections:
Pick Up & Drop Off:
- Pre-set pick-up and drop-off points (editable or non-editable).
- Define operational zones for pick-up/drop-off locations.
- Choose the geolocation engine for autocompleting inputs when creating bookings.
- For the drop-off area, you can also set restricted zones.
VIA (Stop Zones):
- Define operational stop zones.
- Select the geolocation engine for VIA input autocomplete.
Booking Form:
- Specify available car types for the service.
- Set a default car type, configure extra charges, and add extra fields as needed.
Step 3: Save and Manage Travel Services
- After configuring the travel service, click the “Submit” button to save it.
- The new travel service will now be available when creating bookings on the “Bookings” page.
Step 4: Edit or Delete Travel Services
- To edit or delete a travel service, use the buttons in the “Actions” column of the list (Fig. 2).
- Hover over each button to see its functionality.
Note:
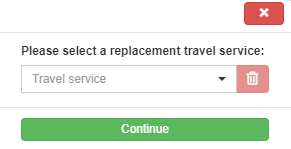
When deleting a travel service, you must assign a fallback travel service where affected bookings will be redirected (Fig. 4).
Key Features of the Travel Services Editor
- Customizable Points: Define pick-up, VIA, and drop-off zones with advanced geolocation options.
- Car Type Options: Configure car types, default selections, and additional charges for tailored services.
- Fallback Mechanism: Ensure seamless operations by redirecting bookings to an alternative service when a travel service is deleted.
Figures and Illustrations
- Fig. 1: Accessing the Travel Services menu option.
- Fig. 2: Viewing the Travel Services list and actions.
- Fig. 3: Configuring a new Travel Service in the editor.
- Fig. 4: Assigning a fallback travel service during deletion.


