Help Center
Print
How to manage invoice templates
Easily create and customize invoice templates to streamline your invoicing process. Follow this guide to access, edit, and manage your invoice templates effectively.
Step 1: Access Notification Templates
- Navigate to the “Notification Templates” option in the “System” sub-menu.
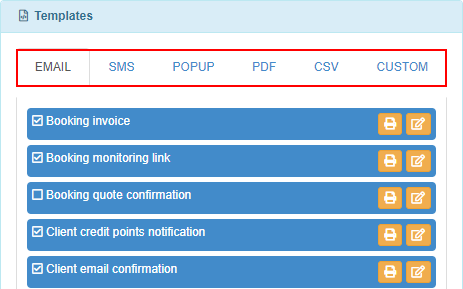
- On the Notification Templates page, you’ll see a list of categories (Email, SMS, Popup, PDF, CSV, Custom) (Fig. 1).
Step 2: Customize Email Invoice Templates
- Select the “Email” category to find the “Booking Invoice” notification, which is sent to clients via email (Fig. 2).
- Each template has two options:
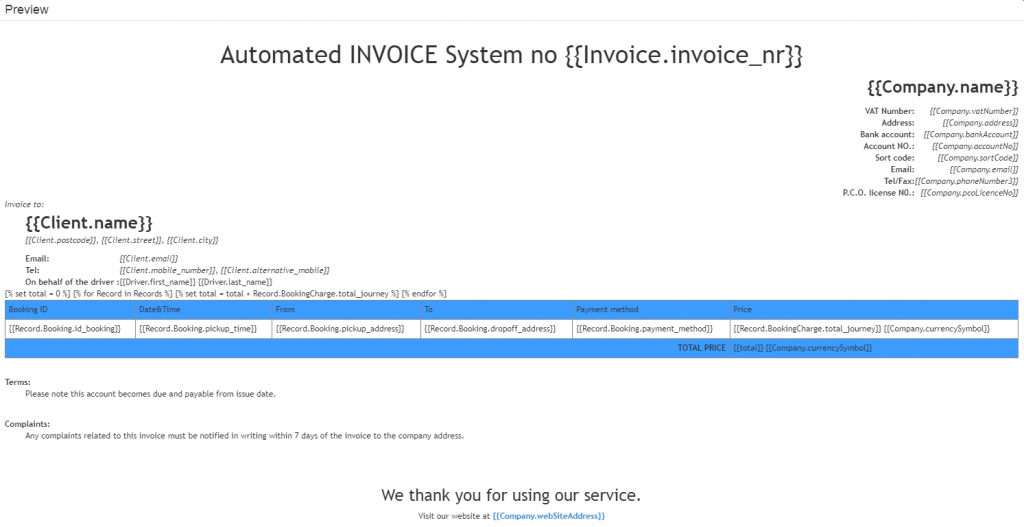
- Preview: Opens a pop-up window displaying the invoice template (Fig. 3).
- Edit: Allows you to customize the template.
Step 3: Understanding Dynamic Fields
- Curly Brace Placeholders: Information within curly braces (e.g., {{client_name}}) is dynamic and will automatically update with actual client details when the template is used.
- Rearrange Content: Customize the layout by moving placeholders around within the template.
Step 4: Edit and Save the Template
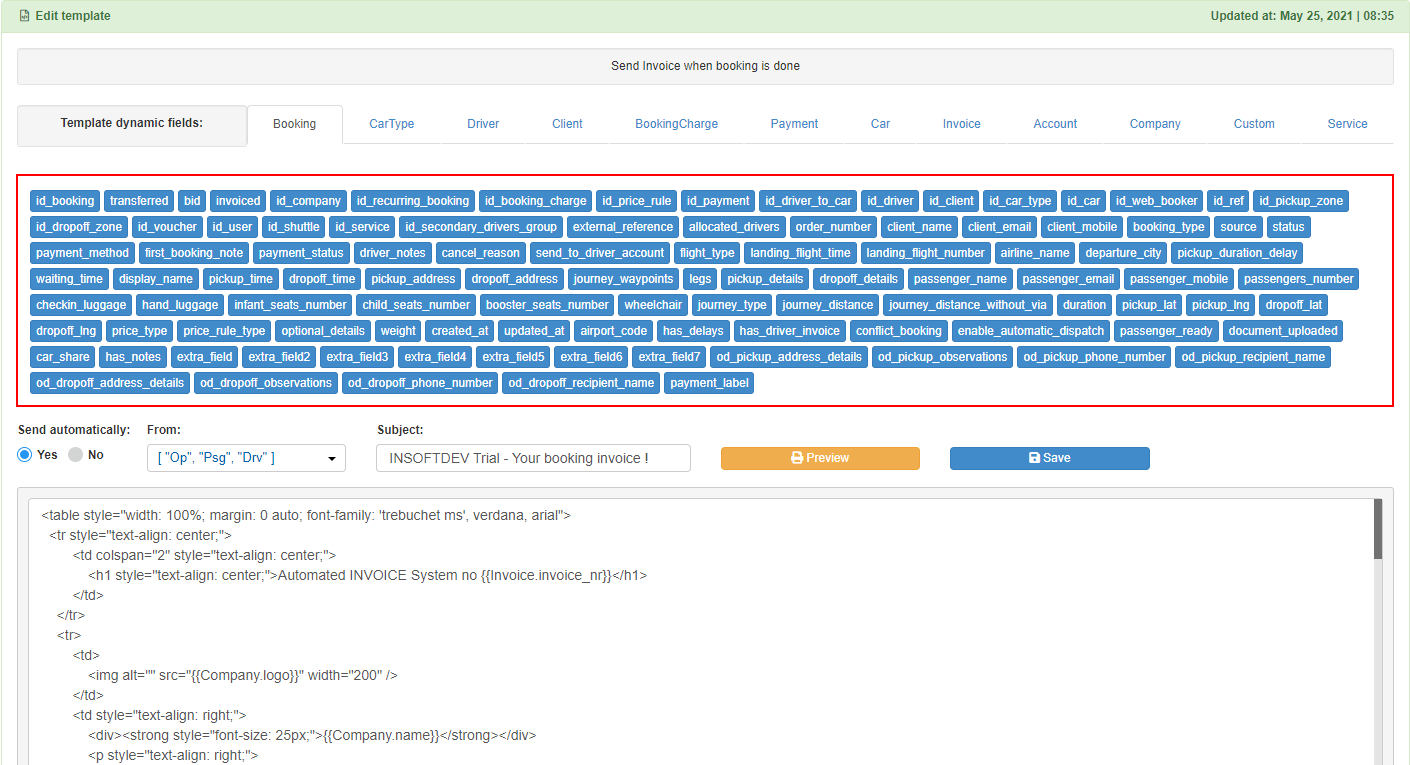
- Click the “Edit” button to open the editor on the right side of the page (Fig. 4).
- Use the toolbar above the text input area to insert curly-braced code snippets automatically, eliminating the need to write them manually.
- Make the desired changes to the template design and content.
- Click the “Save” button to save your edits.
Step 5: Customize PDF Invoice Templates
- To edit the PDF version of the invoice sent to clients, select the “PDF” category from the Notification Templates page (Fig. 1).
- Click the “Client Invoice” item in the list to open and edit it, following the same steps as for the email template.
Key Features of Invoice Template Management
- Dynamic Fields: Automatically populate client-specific data in your templates.
- Customizable Layouts: Tailor email and PDF invoice designs to meet your business needs.
- Simple Tools: Use the toolbar to easily insert pre-coded placeholders into templates.
- Multi-Format Support: Manage invoice templates across multiple formats, including Email and PDF.
Figures and Illustrations
- Fig. 1: Notification templates categorized for easy navigation.
- Fig. 2: Email invoice template for client notifications.
- Fig. 3: Preview of an invoice template.
- Fig. 4: Template editor with a toolbar for dynamic field insertion.


