Help Center
How to manage the individual and business clients
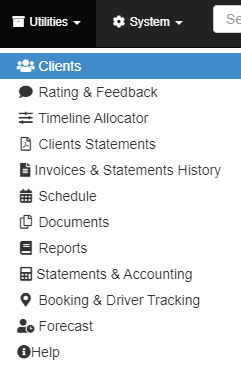

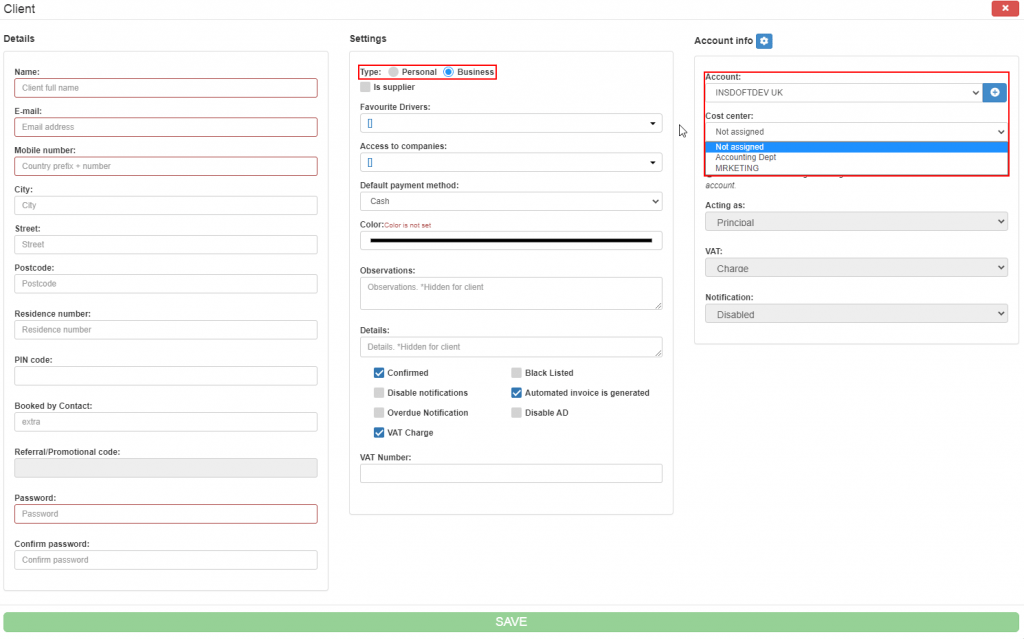
The clients can have two type of accounts, “Personal” and “Business”. To create a new account, first you have to click the “Clients” option in the “Utilities” sub-menu (fig. 1). The “Clients” page is a list containing all the clients registered in the Backoffice application. Next, you have to click the “ADD NEW CLIENT” button (fig. 2). Once you clicked the button, a window will pop-up on the screen containing inputs you have to complete to configure the client information (fig. 3). The window is structured in three areas: “Details”, “Settings”, “Account info”. In the “Settings” area you can select what type of account you want to create. In the “Account info” you assign the client to a certain account and if that account has cost center, you can assign it to a cost center.
After completing all the required fields, click the “SAVE” button to create your client account. Now you will be able to find your client in the list. You can use the filters available to refine your search. In order to edit the client information or delete a client account, use the buttons available in the “Actions” column. Hover over them to see their functionalities.
| Cookie | Duration | Description |
|---|---|---|
| cookielawinfo-checkbox-analytics | 11 months | This cookie is set by GDPR Cookie Consent plugin. The cookie is used to store the user consent for the cookies in the category "Analytics". |
| cookielawinfo-checkbox-functional | 11 months | The cookie is set by GDPR cookie consent to record the user consent for the cookies in the category "Functional". |
| cookielawinfo-checkbox-necessary | 11 months | This cookie is set by GDPR Cookie Consent plugin. The cookies is used to store the user consent for the cookies in the category "Necessary". |
| cookielawinfo-checkbox-others | 11 months | This cookie is set by GDPR Cookie Consent plugin. The cookie is used to store the user consent for the cookies in the category "Other. |
| cookielawinfo-checkbox-performance | 11 months | This cookie is set by GDPR Cookie Consent plugin. The cookie is used to store the user consent for the cookies in the category "Performance". |
| viewed_cookie_policy | 11 months | The cookie is set by the GDPR Cookie Consent plugin and is used to store whether or not user has consented to the use of cookies. It does not store any personal data. |