Help Center
INSOFTDEV – Passenger app introduction
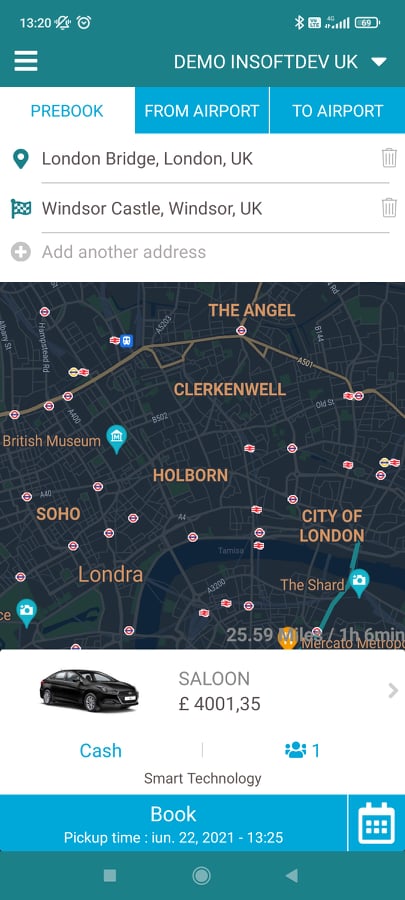
INSOFTDEV’s Passenger Application is a modern and user-friendly solution for the ride-sharing industry, simplifying the booking process into three easy steps. This guide provides an overview of the app’s key features and functionalities, from creating a booking to managing your profile and settings.
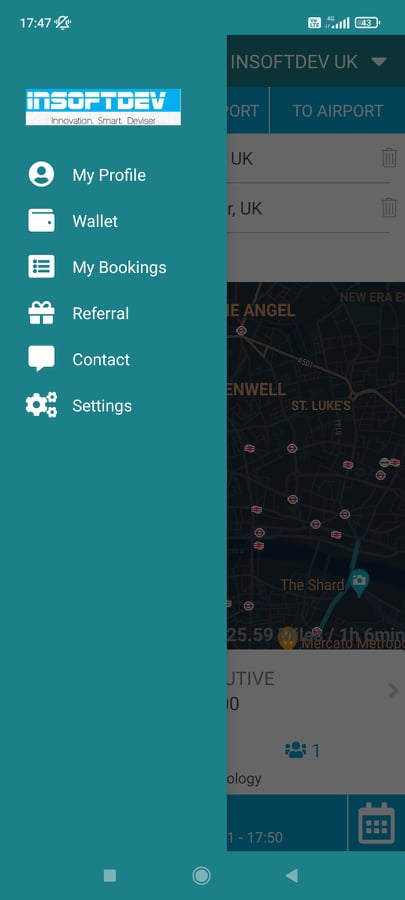
Access the menu by clicking the Hamburger Icon in the top-left corner (Fig. 4). The menu includes:
My Profile:
Wallet:
My Bookings:
Referral:
Contact:
Settings:
| Cookie | Duration | Description |
|---|---|---|
| cookielawinfo-checkbox-analytics | 11 months | This cookie is set by GDPR Cookie Consent plugin. The cookie is used to store the user consent for the cookies in the category "Analytics". |
| cookielawinfo-checkbox-functional | 11 months | The cookie is set by GDPR cookie consent to record the user consent for the cookies in the category "Functional". |
| cookielawinfo-checkbox-necessary | 11 months | This cookie is set by GDPR Cookie Consent plugin. The cookies is used to store the user consent for the cookies in the category "Necessary". |
| cookielawinfo-checkbox-others | 11 months | This cookie is set by GDPR Cookie Consent plugin. The cookie is used to store the user consent for the cookies in the category "Other. |
| cookielawinfo-checkbox-performance | 11 months | This cookie is set by GDPR Cookie Consent plugin. The cookie is used to store the user consent for the cookies in the category "Performance". |
| viewed_cookie_policy | 11 months | The cookie is set by the GDPR Cookie Consent plugin and is used to store whether or not user has consented to the use of cookies. It does not store any personal data. |