Help Center
Print
INSOFTDEV – Passenger app introduction
INSOFTDEV’s Passenger Application is a modern and user-friendly solution for the ride-sharing industry, simplifying the booking process into three easy steps. This guide provides an overview of the app’s key features and functionalities, from creating a booking to managing your profile and settings.
Steps to Create a Booking
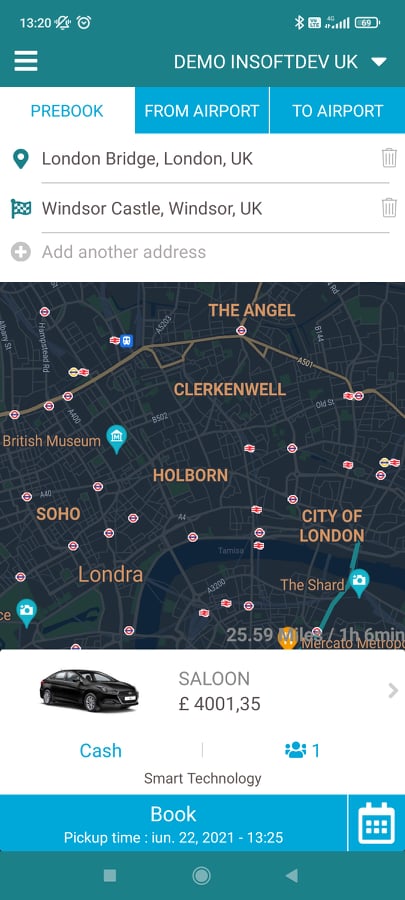
Step 1: Choose Your Route
- Select your service type from the top of the main page:
- Prebook, FROM AIRPORT, TO AIRPORT (these can be customized via the Backoffice application).
- Fill in the Pick-Up and Drop-Off Points.
- Add a Stop On the Way (SOTW) by clicking the “Add another address” text field.
Step 2: Customize Booking Details
- Select Car Type:
- Swipe through available car types or click the car icon to view a list of options.
- Set Payment Method:
- Click the default payment method (e.g., Cash) to choose another option.
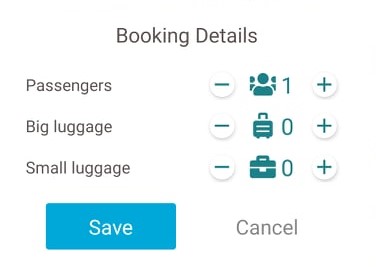
- Adjust Passengers and Luggage:
- Click the passenger icon to open a pop-up window.
- Modify the number of passengers and luggage by tapping the “+” or “-” buttons (Fig. 5).
Step 3: Submit the Booking
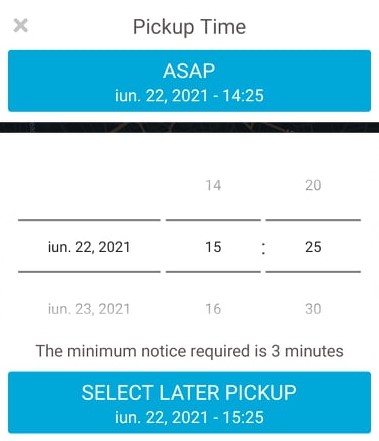
- Click the “Book” button for an ASAP (as soon as possible) booking.
- To schedule the booking for a later time, click the Calendar Icon and select your desired date and time (Fig. 6).
- Fill in the Passenger Information and press the “Submit Booking” button.
Logging In and Registering
Login Process
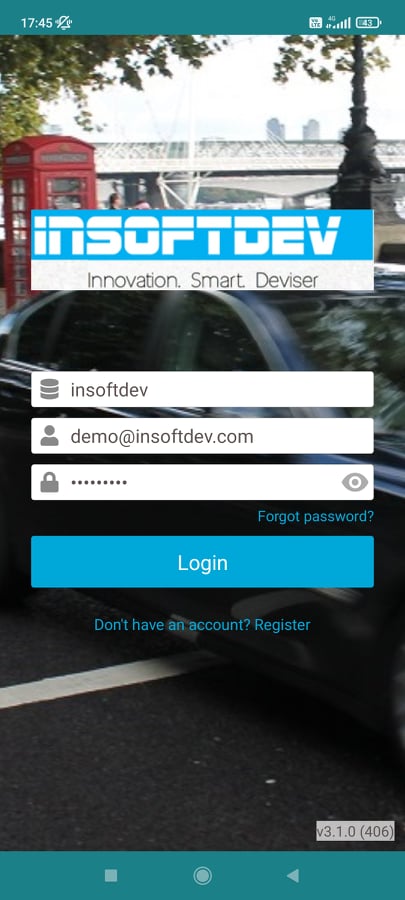
- Open the app and log in using:
- Company ID, Email, and Password (Fig. 1).
- Forgot your password? Tap “Forgot password?” to receive reset instructions via email.
Registering an Account
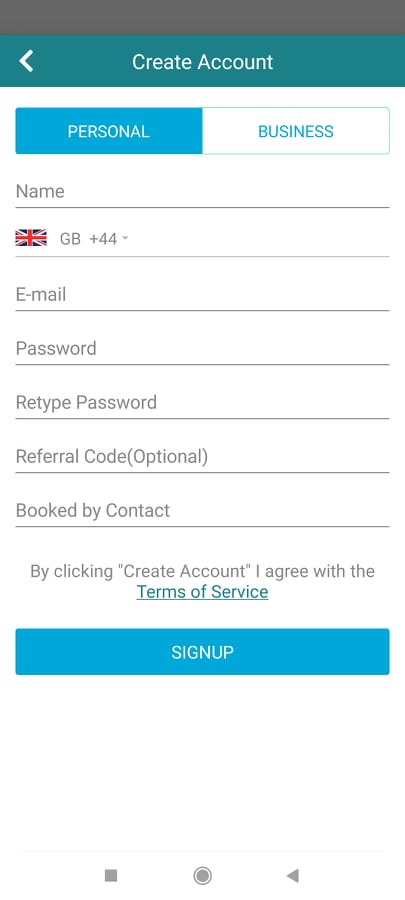
- If you don’t have an account, click “Don’t have an account? Register.”
- Choose between two account types:
- Personal Account: Fill in the required details and click “Signup.”
- Business Account: Fill in the required details and click “Validate.” (Fig. 2).
Navigating the Passenger App
Main Page
- The main page is your starting point for creating bookings (Fig. 3).
Menu Options
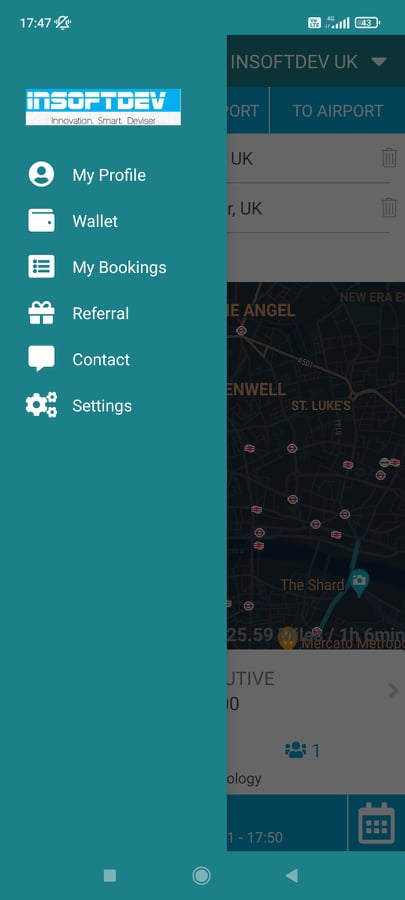
Access the menu by clicking the Hamburger Icon in the top-left corner (Fig. 4). The menu includes:
My Profile:
- Edit contact information, address, or password.
- Add favorite addresses or log out of the app.
Wallet:
- Add, edit, or delete credit cards and vouchers.
My Bookings:
- View bookings categorized as In Progress, Upcoming, or Completed.
- For Upcoming bookings, click the red “X” icon to cancel them.
Referral:
- Share your referral code with friends. Earn rewards when they use your code to create an account.
Contact:
- View company contact information and terms & conditions.
Settings:
- Check the app version, change the language, and customize settings:
- Enable/disable notifications via email and SMS.
- Enable/disable automatic tracking.
- Generate automatic invoices for each trip.
- Check the app version, change the language, and customize settings:
Key Features of INSOFTDEV’s Passenger App
- Streamlined Booking: Complete the entire booking process in three steps directly from the main page.
- Customizable Options: Tailor car types, payment methods, and passenger details to your needs.
- Comprehensive Menu: Manage profiles, bookings, referrals, and settings from one place.
- Multi-Language Support: Easily switch the app language for a global user base.
Figures and Illustrations
- Fig. 1: Passenger Application login screen.
- Fig. 2: Registering a personal or business account.
- Fig. 3: Main page for creating bookings.
- Fig. 4: Passenger Application menu options.
- Fig. 5: Modifying passengers and luggage.
- Fig. 6: Scheduling a pickup for a later time.
